How to see an umbra with an extended source
• James Hedberg
Introduction
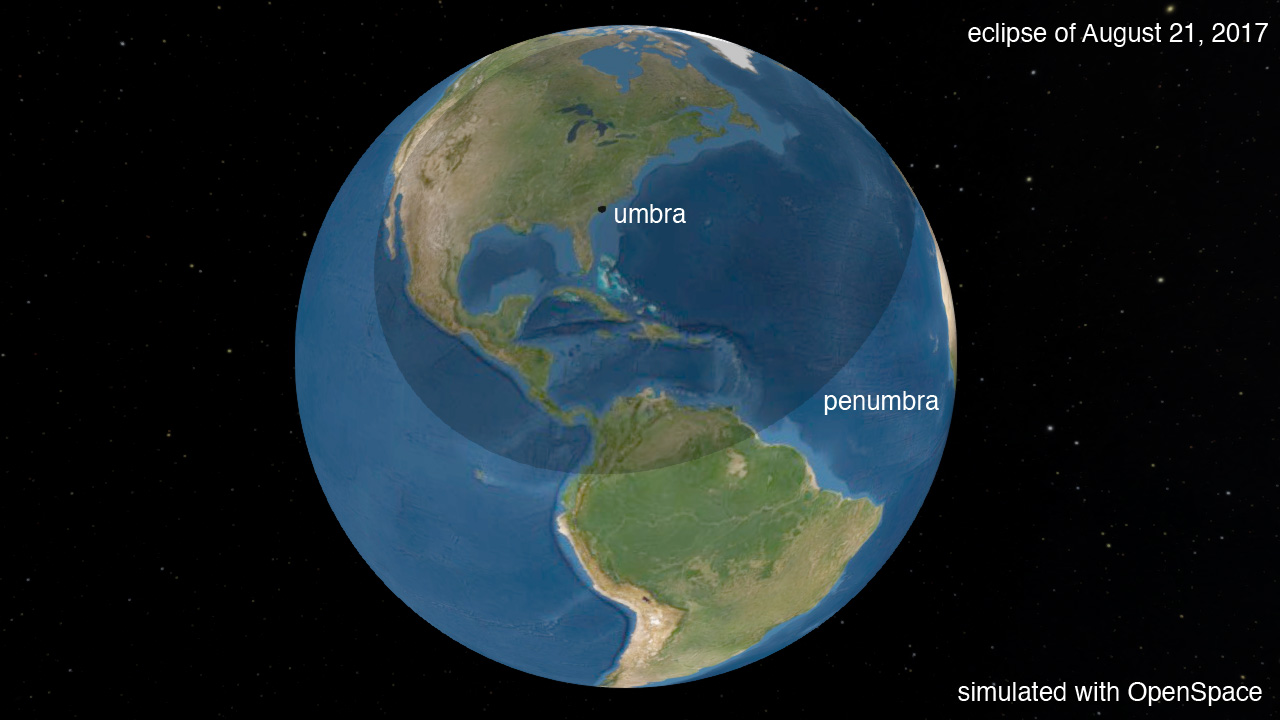
When we show images or simulations of the shadow cast by the moon during a total solar eclipse, the usual image shows a large fuzzy region, called the penumbra and a smaller, darker area known as the umbra.
Here’s a simulated view of the 2017 Great North American Eclipse, showing the umbra as it passes into the ocean. The umbra is small compared to the large penumbra.
Geometry
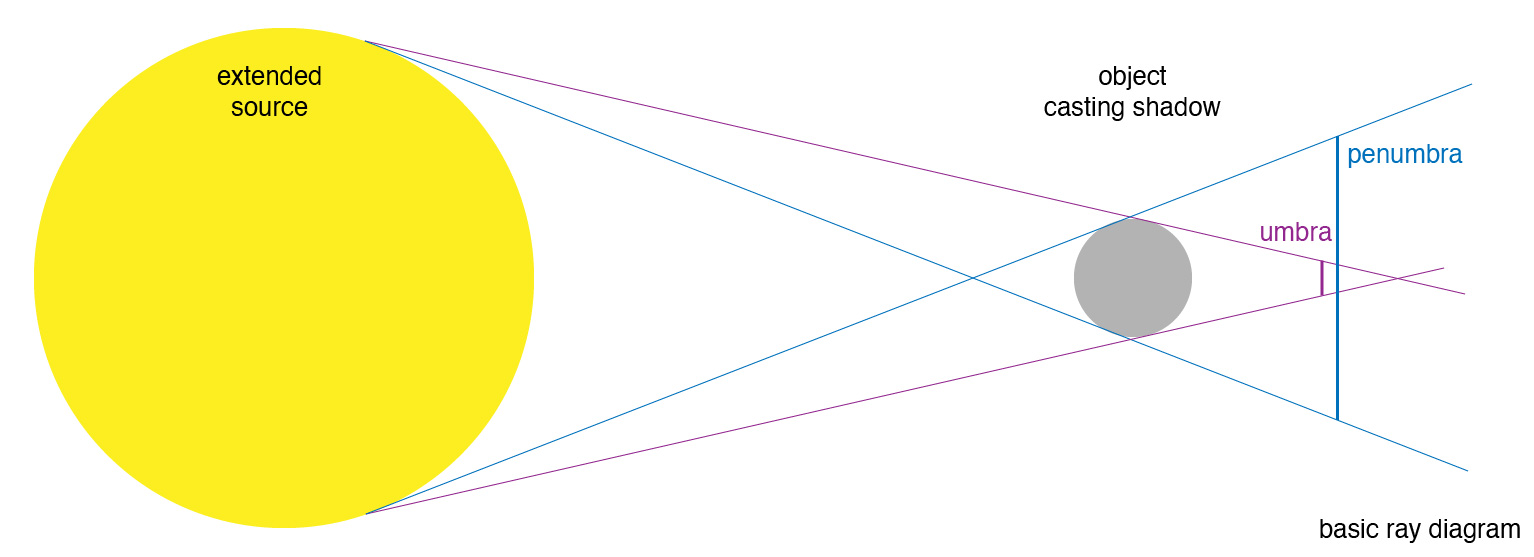
Now, we’ve seen shadows all our lives, and usually they are either larger or roughly the same size as the object casting the shadow. Think of the long shadows you yourself cast in the evening. So, how does the moon make such a small shadow on the earth? The answer is that shadows can consist of several parts, and the sizes of those parts will depend on the sizes of the light source and the object. If you have a light source that is larger than the object, like the sun and moon, and you draw a classical ray diagram, you can see how there will be two different sections. In blue, we have the penumbra, where the shadow slowly gets darker as it approaches the center. In the very center is the umbra, where the object casting the shadow completely obscures the light source. The umbra is totally dark because there is no path from the light source to the screen than is not blocked by the object. In the penumbra, only a portion of the light rays are blocked. Draw it out yourself if you need more convincing.
If you’re ok trusting geometry alone, then you can stop here. However, if you want to see it for yourself, as they say, then read on for a quick, little DIY example of how to see the umbra and penumbra for a shadow.
Do it yourself
You’ll need some things (not fancy things of course)
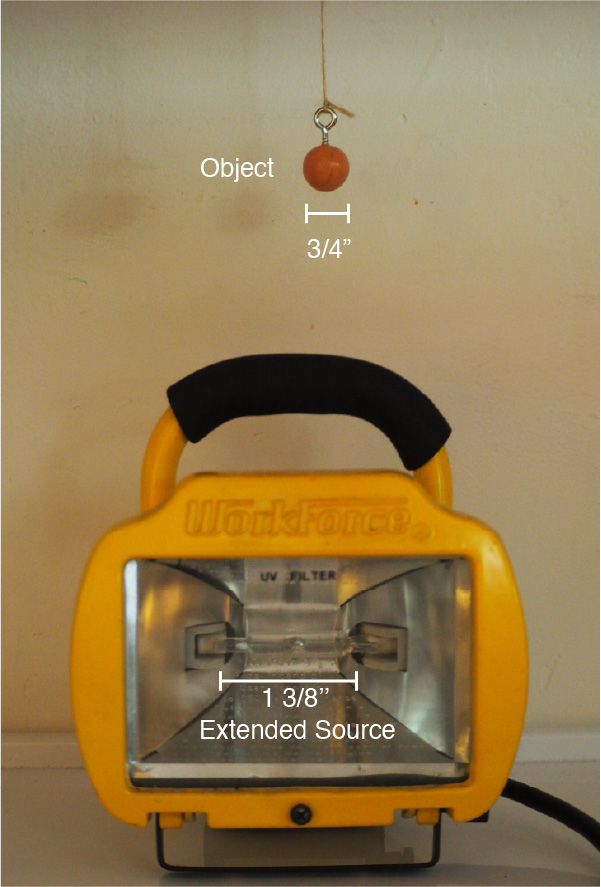
- An extended light source. We used a work lamp with a large 1 3/8’’ long bulb.
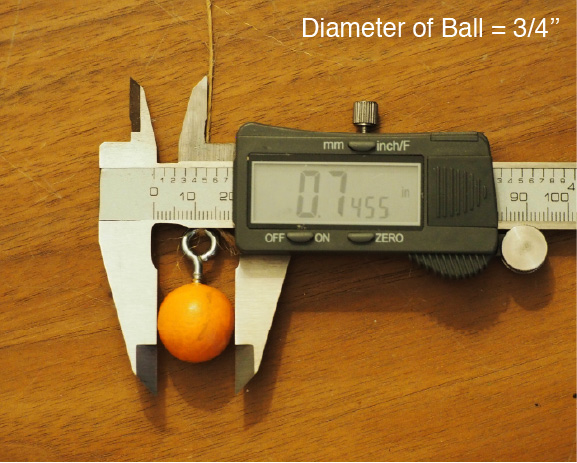
- An object that will cast the shadow. A small 3/4’’ wooden ball did the trick here.
- A wall to observe the shadows on
- A ruler
The most important part is that the light source emitting the light is larger than the object that’s casting the shadow. Most simple LED flashlights won’t suffice because the LED that does the emitting is only a few millimeters wide. Too small to see this effect. That’s why we used a long bulb here.
And a close up of our measurement of the ball, just for fun and to make sure our micro-calipers still work.
Next, we’ll set the ball up in the path of the light and see what shows up on the wall.

You’ll need to play with the distances between the ball and the light and the wall until you see the shadow forming.
If you’ve set things up as described you should see something like this.
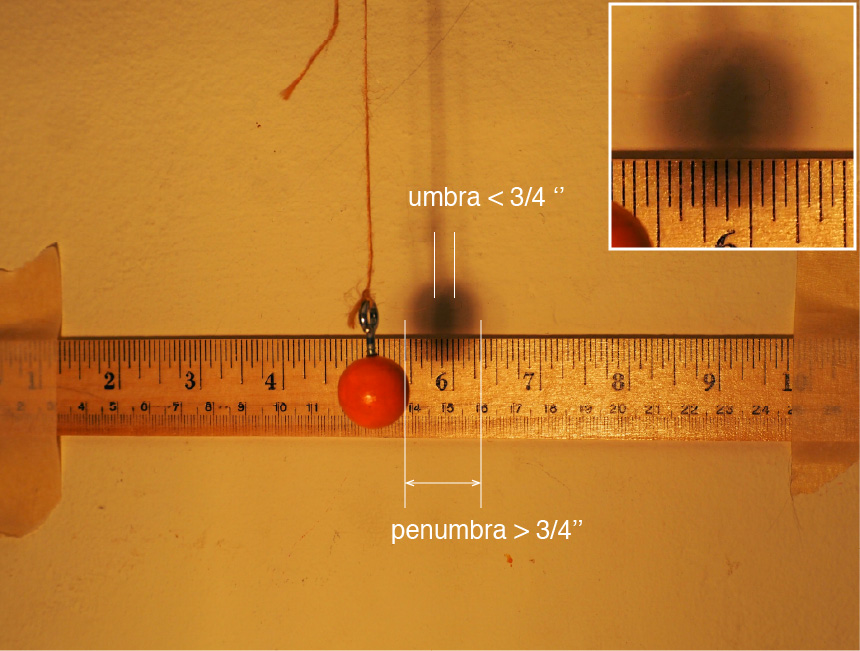
You can see for yourself that the shadow has two different parts, a lighter fuzzier region (the penumbra) and a smaller, darker area (the umbra). Now, go ahead and measure the umbra. You’ll find it to be smaller than the ball. In this case, it’s about a 1/4’’ wide.
One interesting feature of this experiment is that the light source, unlike the sun, is only extended in one direction: horizontally. So, the umbra is only reduced in the horizontal direction, leading to a sort of squashed circle, or cat’s eye shape. At first this might be problematic, since it doesn’t exactly replicate an eclipse, but it does help show the different between an extended source (horizontal) and a point source (vertical), which is really the whole point of this.
Conclusion
We hope this little experiment might be fun for folks to try. Like many things in science, it can be hard to ‘see it for yourself’ so unless you’re somewhat trained in math and logic, it can be a challenge. However, there are examples, like this, that with a little teeny bit of DIY spirit, one can do with household objects.